Pruning shears are to gardeners what scissors are to hairdressers: seemingly ordinary yet indispensable tools that simplify tasks and protect plants. An optimal pair can make tasks simpler while safeguarding plants - even though some might use kitchen or office scissors for trimming purposes! Before making that argument, imagine having to cut fabric using kitchen shears! Aside from being unprofessional, dull tools may even damage plants more severely; therefore we must understand why sharp shears matter so much, as well as how to revive ours!

The image above displays an example of neglected, rusty shears (left) against sharp, well-maintained ones (right). Dull blades often crush stems instead of cutting them cleanly, leading to tissue damage that invites infections and prevents regrowth; sharp blades cut cleanly without straining plants, making maintenance much simpler for plants! If your cuts resemble those seen in the image then it might be time to sharpen or replace your shears!
Step-by-Step Sharpening Guide
Tools You’ll Need
- Wrench(for disassembly)
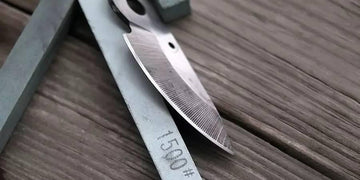
- Sharpening stones (grits: 120#, 320#, 600#, 1000#, 1500#)
- WD-40 rust remover/lubricant(post-sharpening care)

Step 1: Disassemble Safely
- Remove the Spring First Skipping this step can send parts ricocheting around like shrapnel! Getting cut before even sharpening!

- Unscrew and Disassemble Shears.

- Take Pictures As You Work - Take photos as you go and prevent yourself from the "Where did this piece belong?!!" panic later on.'

Step Two: Grind Away Imperfections
- Start with the coarsest stone (320#) to remove nicks. Hold the blade vertically and grind until smooth.

- Check for a “white line” along the edge – gaps mean more grinding is needed.

Step 3: Refine the Edge

- Medium grit (320#): Lubricate the stone with water and grind *in one direction* (blade base to tip). No DJ-worthy frantic motions – slow and steady wins!

- Progress to finer grits (600#→1000#→1500#) to polish the edge. The blade should feel silky, not like sushi-grade raw fish!

Step 4: Remove Burrs & Reassemble
- Use the 1500# stone at a <5° angle to gently buff the backside of the blade.
- Reassemble in reverse order. Lost a part? That’s why we took photos!

Step 5: Test Your Masterpiece
- Paper test: A sharp shear slices through tissue like butter. If it struggles, check blade alignment.

- Pro tip: Cheap shears often have poor blade fit – test with paper before buying new ones (discreetly, unless you want strange looks from the store owner!).

Maintenance Secrets
- Post-use care: Spray WD-40 on blades to remove sap and prevent rust.
- Seasonal TLC: Adjust maintenance for humidity (e.g., magnetic storage to repel moisture).

When to Call for Backup?
If sharpening feels daunting, ask a skilled friend or professional. Remember: A well-loved tool reflects your respect for life itself.
Looking to get a new pair of gardening shears?
Zhang Xiaoquan's gardening shears are crafted from high-quality steel and built to last. If you don't want to bother sharpening your gardening shears (we all know how tedious that can be), check out these Zhang Xiaoquan gardening shears to see if any catch your fancy.