Table of Contents
Introduction
Your Chinese cleaver just crushed that tomato instead of slicing it cleanly. Sound familiar? A dull cleaver isn't just frustrating - it's actually more dangerous than a sharp one.
Here's the thing about Chinese cleavers: they're built to last generations, but only if you know how to keep them sharp. Unlike your average kitchen knife, these workhorses need specific care techniques that most Aussie home cooks never learn.
Whether you're dicing vegetables for a stir-fry or preparing ingredients for weekend meal prep, a properly sharpened cleaver transforms your cooking experience. No more struggling with tough cuts or uneven slices - just clean, efficient cuts every time.
Bottom Line Up Front
Sharpening your Chinese cleaver properly involves three key elements: maintaining a 15-20° angle, choosing the right sharpening method for your skill level, and regular maintenance between sharpenings. Master these basics, and your cleaver will serve you for decades.
Sharpening Methods Explained
Not all sharpening methods are created equal. Here's what actually works for Chinese cleavers:
Whetstone Sharpening (The Gold Standard)
Think of whetstones as the old-school method that pros swear by. Yes, there's a learning curve, but the results speak for themselves.
| Pros | Cons |
|---|---|
| Complete control over sharpening angle | Requires practice and patience |
| Removes minimal material from the blade | Time-consuming process |
| Creates razor-sharp edges | Need to soak stones beforehand |
| Works with all steel types | Multiple grits required for best results |
When to use: Regular sharpening sessions, when you want the sharpest possible edge, or when your cleaver has nicks or serious dullness.
Sharpeners (The Quick Fix)
Sharpeners are like the fast food of knife sharpening - quick and convenient, but not always the healthiest choice for your blade.
| Pros | Cons |
|---|---|
| Fast and easy to use | Removes more metal than necessary |
| Consistent angle every time | Limited control over the process |
| No skill required | Can overheat the blade |
| Good for quick touch-ups | May not work well with harder steels |
When to use: Quick touch-ups between whetstone sessions, or when you're in a hurry and need a decent edge fast.
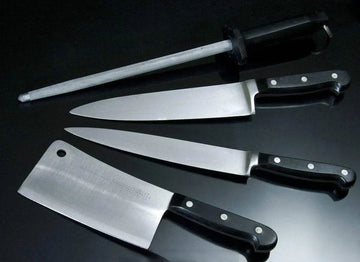
Honing Rods (The Maintenance Tool)
Here's where many people get confused: honing rods don't actually sharpen your cleaver. They realign the microscopic edge that gets bent during use.
| Pros | Cons |
|---|---|
| Perfect for regular maintenance | Doesn't create new edge material |
| Quick daily or weekly touch-ups | Won't fix truly dull blades |
| Extends the time between sharpenings | Requires proper technique |
| Doesn't remove blade material | Limited effectiveness on damaged edges |
When to use: Weekly maintenance, before cooking sessions, or when your cleaver feels slightly less sharp than usual.
Multi-Function Sharpeners (The Compromise)
These combine different sharpening methods in one tool. Think of them as the Swiss Army knife of sharpeners.
Best for: Home cooks who want versatility without investing in multiple tools. The Zhang Xiaoquan 195mm Diamond Abrasive Kitchen Knife Sharpener works particularly well for Chinese cleavers.
Step-by-Step Sharpening Guide
Let's walk through the whetstone method - it's the most effective way to get professional results at home.
What You'll Need
Before you start, gather these essentials:
- Coarse grit whetstone (400-600 grit) for dull blades
- Fine grit whetstone (1000-3000 grit) for polishing
- Non-slip mat or damp towel
- Container for soaking stones
- Clean cloth for drying
The Sharpening Process
Step 1: Prepare Your Workspace
Set up on a stable surface with good lighting. Place your non-slip mat down and position the soaked whetstone on top. Safety first - you want zero movement during sharpening.
Step 2: Find Your Angle
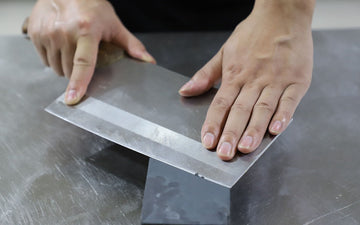
Hold your cleaver at 15-20° to the stone surface. Here's a simple trick: imagine you're trying to slice a thin piece off the stone. That's roughly the right angle.
Step 3: Start Sharpening
Push the blade across the stone in smooth, consistent strokes. Cover the entire edge from heel to tip. Apply light, even pressure - let the stone do the work, not your muscles.
Step 4: Check for the Burr
After several strokes, run your finger carefully along the back edge of the blade. Feel that tiny ridge of metal? That's the burr - it means you're making progress.
Step 5: Flip and Repeat
Once you've raised a burr on one side, flip the cleaver and repeat the process on the other side. Aim for the same number of strokes to keep things even.
Step 6: Polish and Test
Move to your finer grit stone for polishing. A few light strokes on each side will remove the burr and create that mirror finish.
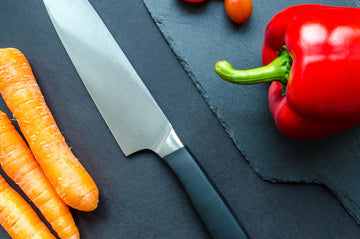
Pro tip: Test sharpness on a piece of paper or a ripe tomato. A properly sharpened cleaver should slice cleanly without crushing or tearing.
Daily Maintenance & Care
Proper maintenance is like regular exercise for your cleaver - a little effort daily prevents major problems later.
After Every Use
Clean Immediately
Wash by hand with warm, soapy water. Dishwashers are the enemy of sharp knives - the high heat and harsh detergents will dull your edge faster than you can say "stir-fry".
Dry Thoroughly
Water spots aren't just unsightly - they can lead to rust, especially on carbon steel cleavers. Dry immediately with a clean cloth.
Weekly Maintenance
Honing Routine
A quick session with a Zhang Xiaoquan 70# Magnetic Steel Honing Rod keeps your edge aligned between sharpenings. Five strokes per side is usually enough.
Storage Check
Inspect your storage setup. Knife blocks, magnetic strips, and blade guards all work well - just avoid loose drawer storage where blades bang against other utensils.
Monthly Deep Care
| Task | Why It Matters | How Often |
|---|---|---|
| Oil application (carbon steel) | Prevents rust and corrosion | Monthly or as needed |
| Handle inspection | Catches loose fittings early | Monthly |
| Edge assessment | Determines sharpening schedule | Every 2-4 weeks |
| Deep cleaning | Removes buildup and stains | Monthly |
Safety Precautions
Sharp knives are actually safer than dull ones, but sharpening them requires extra caution. Here's how to stay injury-free:
Essential Safety Rules
Rule 1: Stable Surface Always
A moving whetstone is an accident waiting to happen. Use non-slip mats, damp towels, or purpose-built stone holders to keep everything locked in place.
Rule 2: Cut-Resistant Gloves
These aren't just for beginners. Even experienced sharpeners benefit from the confidence that comes with protected hands. Look for level 5 protection gloves.
Rule 3: Lighting Matters
Good lighting helps you maintain consistent angles and spot potential problems before they become dangerous. Natural light or a bright LED work lamp is ideal.
Rule 4: Stay Focused
Sharpening isn't a background activity. Put away distractions, turn off the TV, and give the task your full attention.
What Not to Do
- Never apply excessive pressure - it won't sharpen faster and increases the risk
- Don't rush the process - hurried movements lead to accidents
- Avoid sharpening when tired or distracted
- Never test sharpness with your finger - use paper or vegetables instead
Recommended Sharpening Tools
The right tools make all the difference. Here's what actually works for Chinese cleavers:
Top Pick for Beginners
Zhang Xiaoquan 70# Magnetic Steel Honing Rod
This combination tool gives you both honing and sharpening capabilities. The magnetic base keeps everything stable, and the corundum provides excellent cutting action without being overly aggressive.
Best Value for Regular Use
Zhang Xiaoquan 195mm Diamond Abrasive Kitchen Knife Sharpener
Diamond plates cut faster than traditional stones and don't require soaking. Perfect for busy cooks who want professional results without the fuss.
Professional Setup
For serious home cooks, consider investing in:
- Dual-grit whetstone (400/1000 or 1000/3000)
- Quality honing steel or ceramic rod
- Leather strop for final polishing
- Angle guide for consistent results
Cultural Background
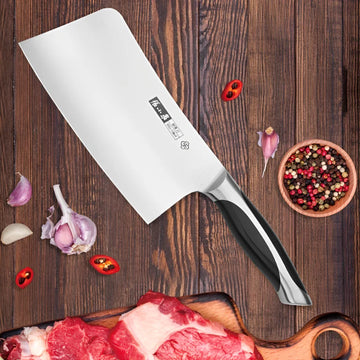
Understanding the history behind your cleaver adds depth to the sharpening ritual. The Chinese cleaver, or "Cai Dao," represents centuries of culinary evolution.
Why Design Matters
Traditional Chinese cleavers weren't just kitchen tools - they were engineering solutions. The wide blade serves multiple purposes: chopping, slicing, crushing garlic, and transferring ingredients. This versatility influenced the sharpening techniques that developed alongside the tools.
Chinese blacksmiths understood that a cleaver needed to hold its edge through diverse tasks. The slightly softer steel used in traditional cleavers actually makes them more forgiving to sharpen than modern super-hard steels.
Modern Applications
Today's Australian kitchens benefit from this centuries-old wisdom. The techniques developed for traditional cleavers work perfectly with modern versions, whether you're using a premium Zhang Xiaoquan model or an entry-level option.
Frequently Asked Questions
Sharpening Frequency
How often should I sharpen my Chinese cleaver?
For home cooks using their cleaver 2-3 times weekly, sharpening every 2-3 months is typical. Heavy users might need monthly sessions. Honing weekly extends these intervals significantly.
Can I over-sharpen my cleaver?
Yes, excessive sharpening removes metal unnecessarily and shortens blade life. Sharp enough to slice paper cleanly is sharp enough for cooking.
Technical Questions
What's the ideal sharpening angle for Chinese cleavers?
15-20° per side works best for most Chinese cleavers. Thinner angles create sharper edges but are more fragile. Thicker angles are more durable but less sharp.
Should I use different angles for different tasks?
Most home cooks benefit from a single, versatile angle of around 18° per side. This provides good sharpness with reasonable durability for mixed kitchen tasks.
Troubleshooting
My cleaver won't get sharp no matter what I do. What's wrong?
Common issues include inconsistent angles, insufficient pressure, or using worn-out sharpening tools. Sometimes the blade has chips or damage requiring professional attention.
How do I remove rust spots from my cleaver?
Light rust responds well to baking soda paste and gentle scrubbing. For stubborn spots, fine abrasive cleaners work, but you'll need to re-sharpen afterward.
Safety Concerns
Is it safe to sharpen at home without experience?
Absolutely, provided you follow safety guidelines and start with less aggressive sharpening methods. Consider taking a local knife skills class if you're particularly nervous.
What should I do if I cut myself while sharpening?
Clean cuts from sharp blades usually heal well with basic first aid. Apply pressure to stop bleeding, clean the wound, and use appropriate bandaging. Seek medical attention for deep cuts or if you can't stop the bleeding.
Equipment Questions
Can I use the same sharpening tools for my other knives?
Yes, whetstones and most manual sharpeners work well for various knife types. Just adjust your technique for different blade shapes and sizes.
Do I need different sharpening tools for stainless vs carbon steel cleavers?
The same tools work for both, but carbon steel typically sharpens more easily and takes a keener edge. Stainless steel requires slightly more patience but holds its edge longer in humid conditions.